Install and Configure for Filing to M-Files
Firstly a big thank you from us for adopting our product. We hope that you like the software and find the next steps easy, but if you have problems or just want to ask a question, please either email support@pentagonsolutions.com or phone us on +44 (0)2890 455355 (Option 3)

Some security systems can misinterpret PentagonMail Assistant's connection to Outlook and background indexing as potential threats, so if you encounter an error please don't assume the software has failed, instead ask your IT experts to white-list our software.
Please let them know that there are four background processes:
PentagonMailAssistant.BackgroundFiler.exe
PentagonMailAssistant.Launcher.exe
PentagonMailAssistant.Indexer.exe
PentagonSolutions.MailAssistant.Broker.exe - if using PMA with New Outlook
And also tell them that there is an Outlook Add-in named PentagonMail Assistant Outlook Addin
We want you to get the best from our software by making it as easy as possible for you to configure and deploy PentagonMail Assistant to your colleagues. We also want you to have the opportunity to learn from the experiences from others so in this section we don't just explain how to set the software up, we also provide some best-practice advice.
So we recommend the following steps which are then detailed below:
- Read and consider the Best Practice Advice on folder structures
- Install the software on your own machine
- Activate your license
- Create a Group on the server
- Test it
- File some messages
- Search for them
- Allocate user licenses
- Deploy the software to users
- Consider the following:
- Cloning a pre-built profile
Read and consider the Best Practice Advice on folder structures
We have seen a lot of different approaches to folder structures, so to help you get it right straight away we have assembled some best practice guidance which we hope you will find useful. Whilst this guidance is based on Windows Folders and not M-Files classes, you may never-the-less find it useful to consider the concepts that it addresses. So please review the guidance on Recommended Location Structures before proceeding further.
Install the software on your own machine
You have probably installed the software already but if you haven't, all of the installers are available in the Downloads & Change Logs section. To complete the next steps you will need to install the M-Files Configurator which is not installed by default, so Install the M-Files Configurator now.
Whilst there are no significant prerequisites we recommend that you take a quick look at the Prerequisites section too.
Activate your license
Depending on the type of license that you have purchased the activation process differs slightly. See the section on Activating Licenses to activate your license.
Create a Group on the server
Hopefully you will have read the best-practice guidance and will have a good idea of how you want to organise your filing. You may however be unfamiliar with the our terminology, so before you create your first Group please review the short section on Understanding Filing Groups.
Next follow the section on Creating an M-Files Group and repeat it for each of the Groups that you will need.
Connecting to your Group
You can now connect to the Group which will then populate the tiles in the Outlook interface with your filing locations. To do this follow the section on Connecting to an M-Files Group.
Test it
File some messages
So you can now try filing some messages to the locations.


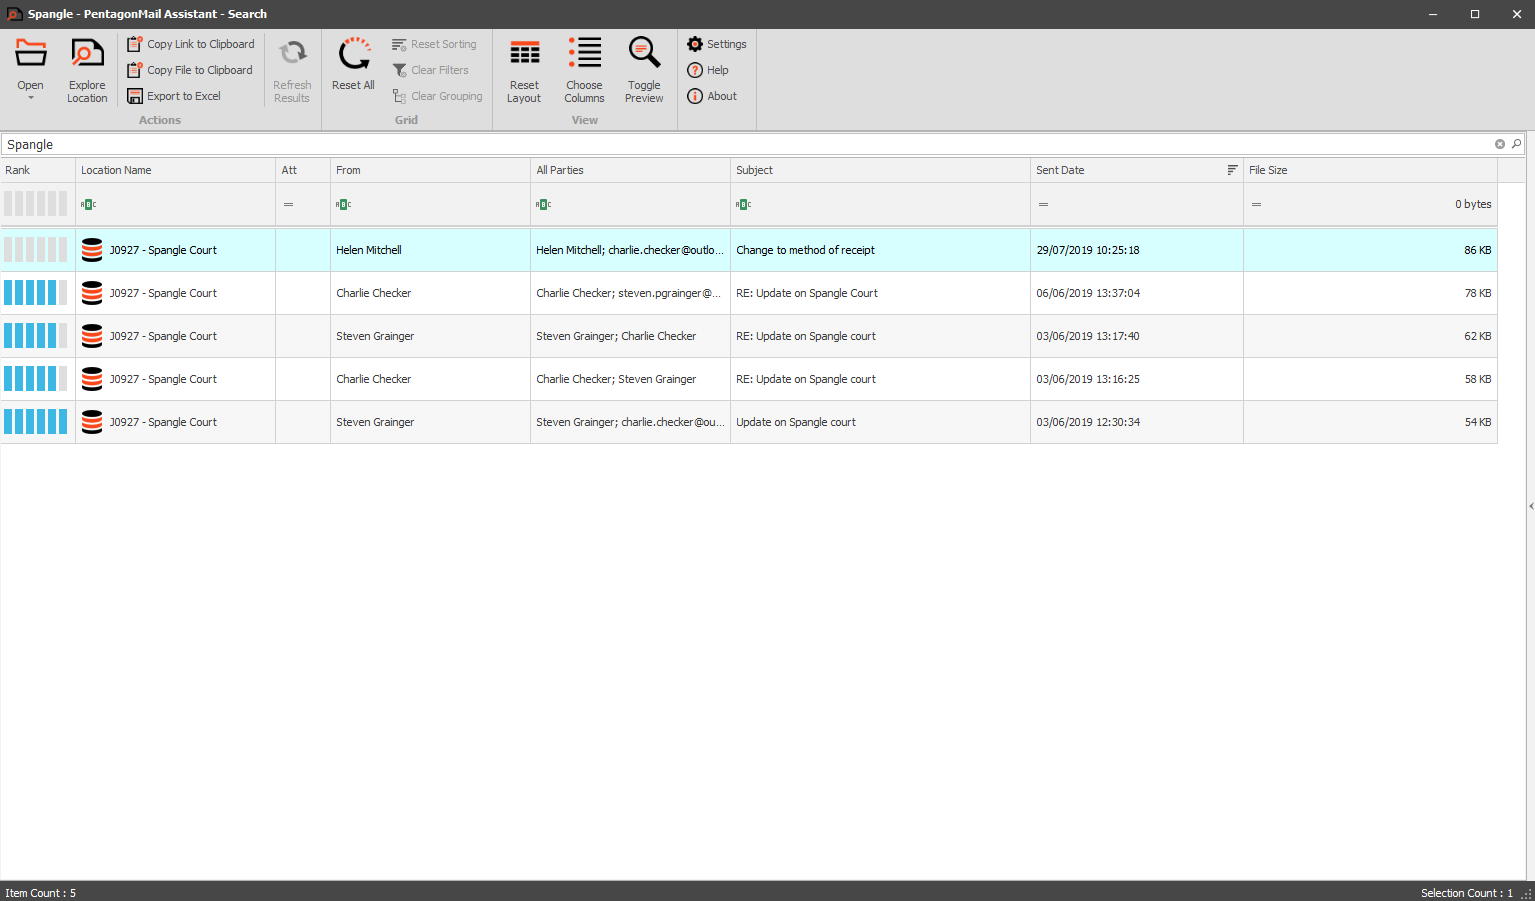
Search for them
Try a simple keyword search to make sure that it is working correctly:

If you want to learn more about the search capabilities watch the videos or take a closer look at the Search sections of this help documentation.
Congratulations! You now have the bones of a working filing system. You will probably want to test it more thoroughly with selected colleagues, so the next steps are to allocate licenses and deploy the software.

Allocate user licenses
If you have purchased Enterprise licenses you will not need to allocate them to staff as anyone with an email account ending with your domain name will be allocated a license. If you have purchased named-user licenses you will have a pool of licenses that you can allocate to staff as required, so now would be a good time to follow the guidance on Managing Licenses.
Deploy the software to users
Small organisations may allow staff to install software on their own computers but larger organisations will not only prevent users from installing software themselves, they will also want to remotely deploy the software to them. So PentagonMail Assistant can be silently deployed to staff using MSIEXEC. For details and examples see the section on Silent installation of the MSI package.
Consider the following:
Before you go further you may wish to reflect on what type of experience you would like your staff to have. Do you want them to start slowly and add more locations and results as they go, or do you want them to start with all the locations immediately available and their index pre-built with the content of the locations they will need?
Cloning a pre-built profile
If you have users starting in a new project office or joining a team where they will immediately need access to certain messages and either they can't wait for the indexing to happen or you have a concern about the impact of multiple machines all indexing the same locations, you should consider cloning a pre-built profile.
