Setting up the PMA to Meridian Connection
If you want to use PentagonMail Assistant with Meridian, after performing the installation with the appropriate features included, please observe the below steps for configuring PentagonMail Assistant to Meridian Connection. Please follow the below steps to perform this.
Should you run into any problems or just want to ask a question, please either email support@pentagonsolutions.com or phone us on +44 (0)2890 455355 (Option 3).

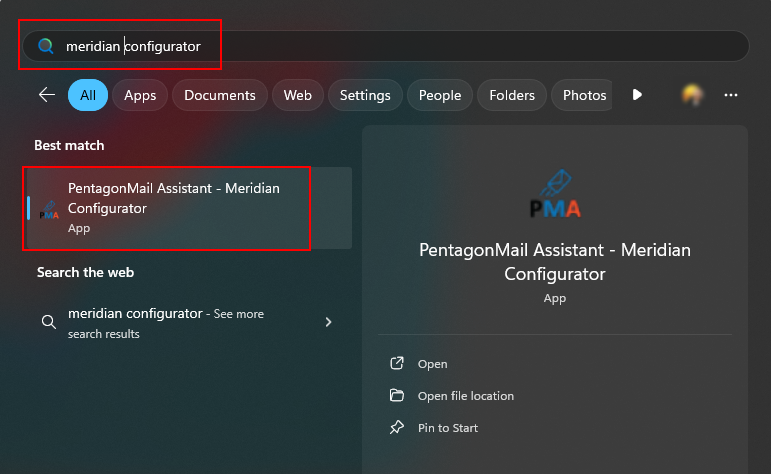
Step 1: Open the “PentagonMail Assistant – Meridian Configurator” from the Windows Search.
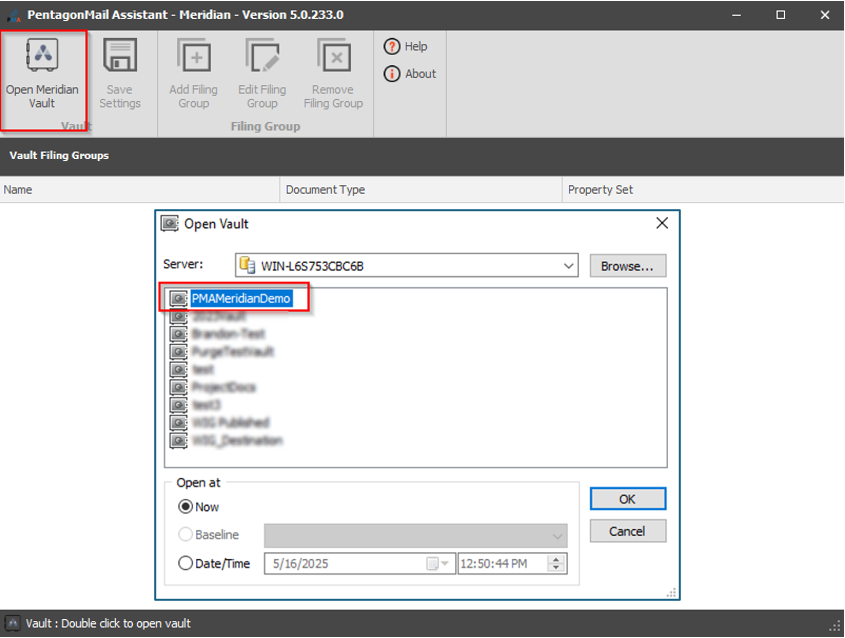
Step 2: Select “Open Meridian Vault” and select the desired vault.
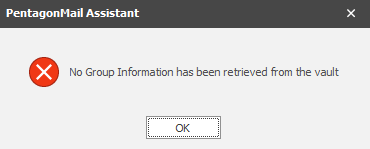
The below error message pops-up to let you know that the vault has not been configured for PMA before. Please press OK.
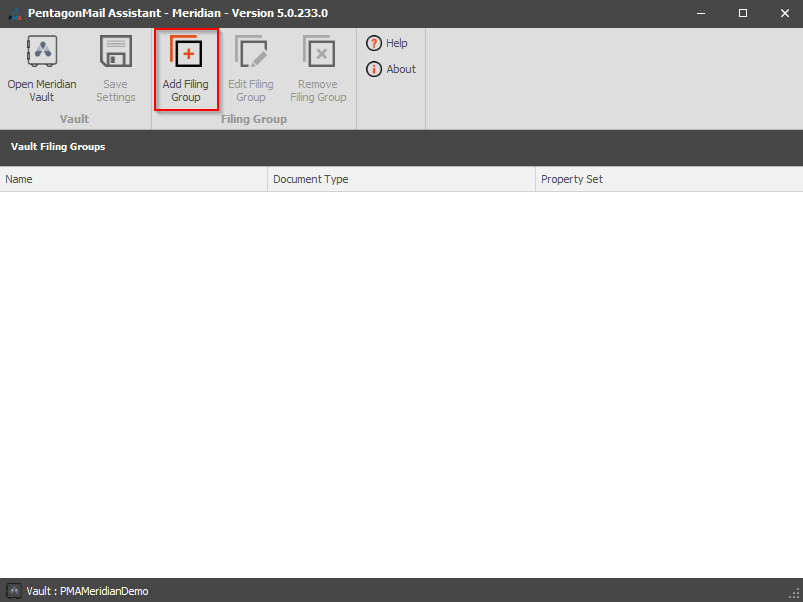
Step 2: Select “Add Filing Group”.
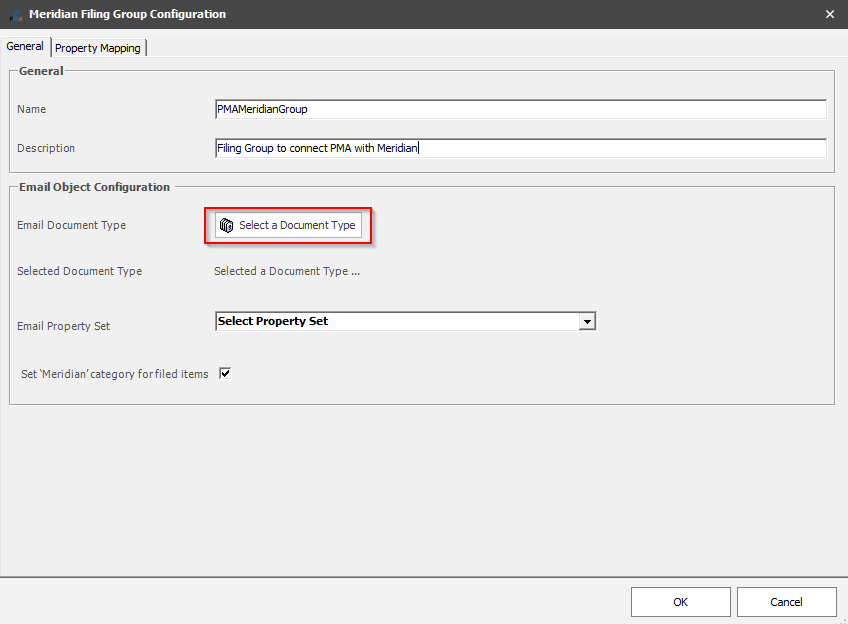
Give the Filing Group a Name and Description (optional). Then, click the “Select a Document Type” button.
General Tab
The properties on this tab have the following impact:
|
Name |
The name of the Group which will appear in the Location Manager and on the filing tile that the user sees |
|
Description |
Shown when selecting and editing Groups |
|
Email Document Type |
The Document Type in Meridian that the saved emails will be saved as when imported/filed into Meridian |
|
Email Property Set |
A PropertySet of the selected Document Type that will be used to store the metadata that is extracted from the Outlook email when filing |
|
Set Meridian Category |
Check this box if you want filed emails to have their Outlook category set to 'Meridian'. NOTE: this will then match what users see if they use the Meridian tools in Outlook |
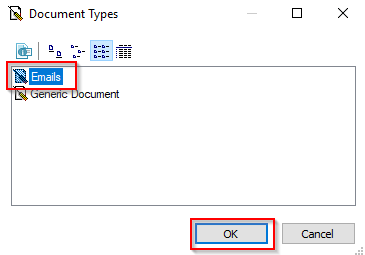
Select the "Emails" Document Type, which was created in previous steps, and click "OK".
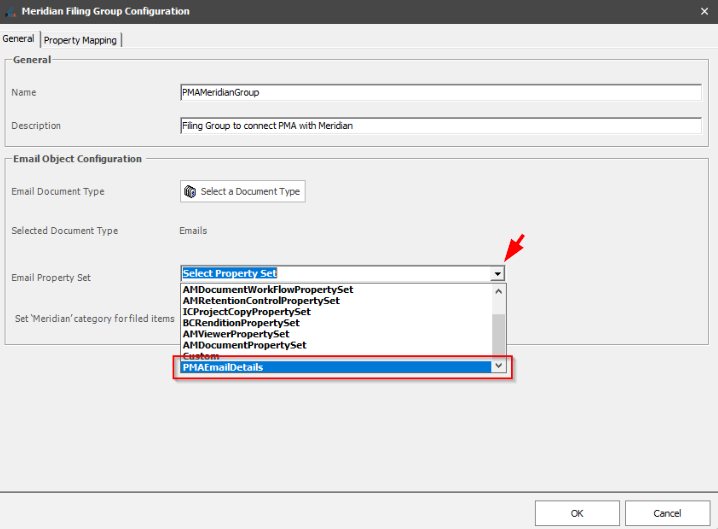
Click the drop-down arrow on the "Email Property Set" option and select the Property Set which was created in previous steps.
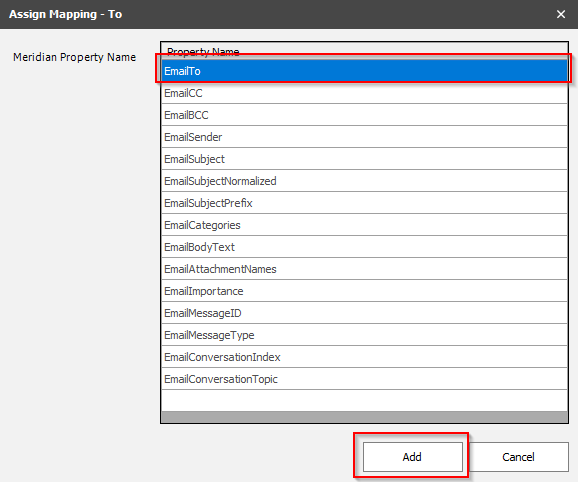
Next go to the “Property Mapping” tab, click the “To” row and click “Assign Mapping”.
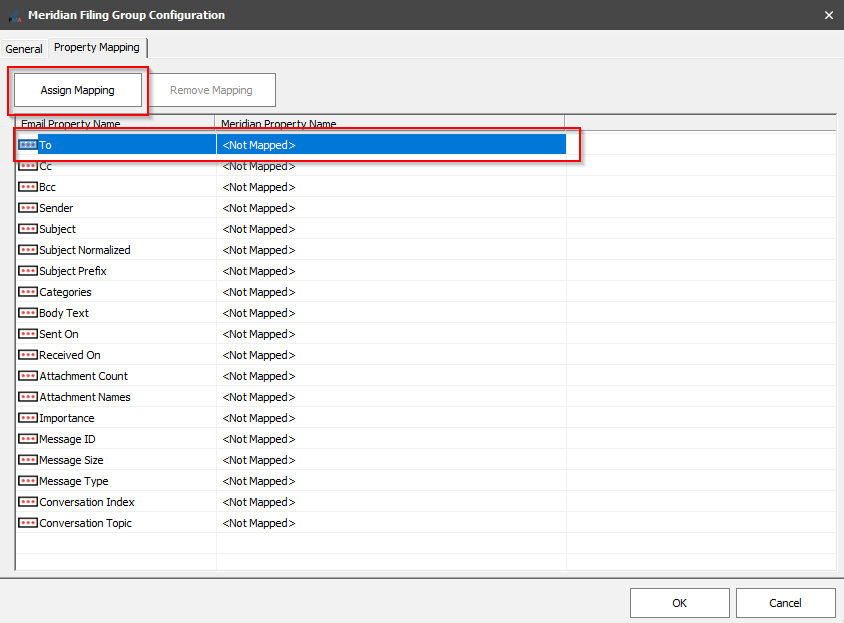
Select “EmailTo” property which was created in a previous step and then Press “Add”.
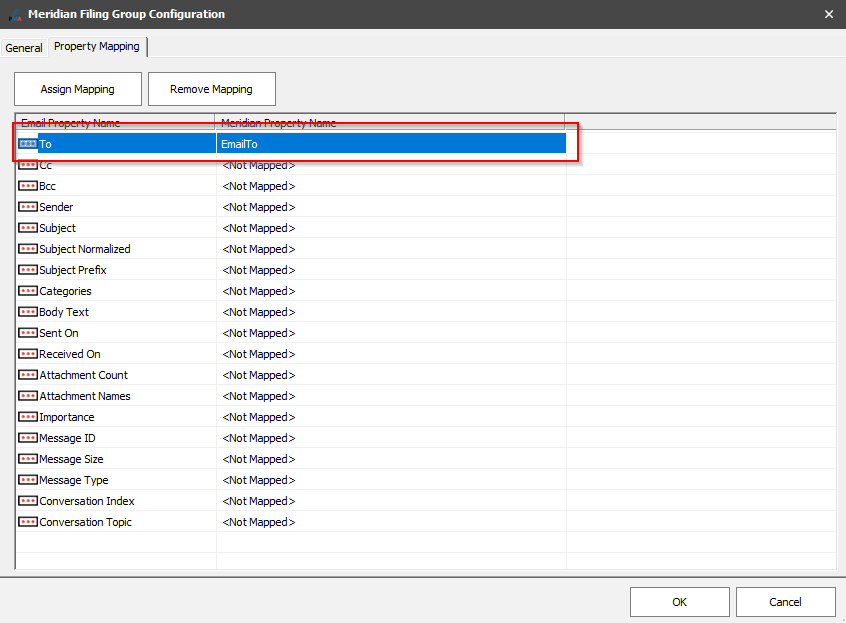
This should result in the grid being update in the following way:
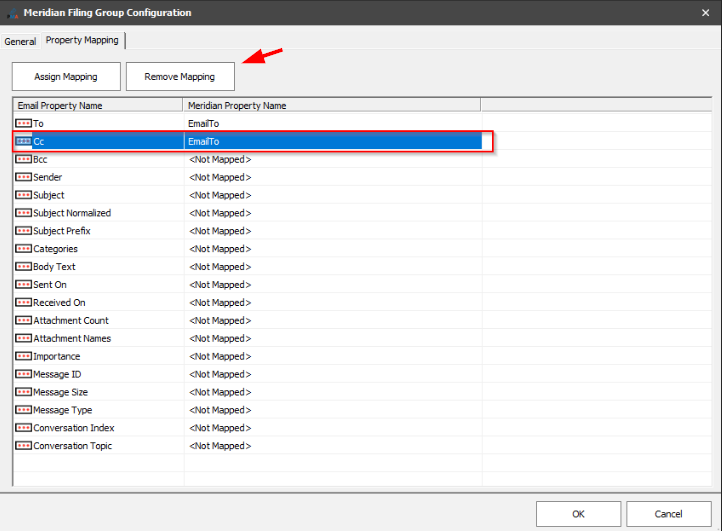
Note: If a mistake is made, use the “Remove Mapping” button to reset the property assignment, such as in the following example, where the "CC" property was accidentally set to the "EmailTo" property instead of the "EmailCC" property.
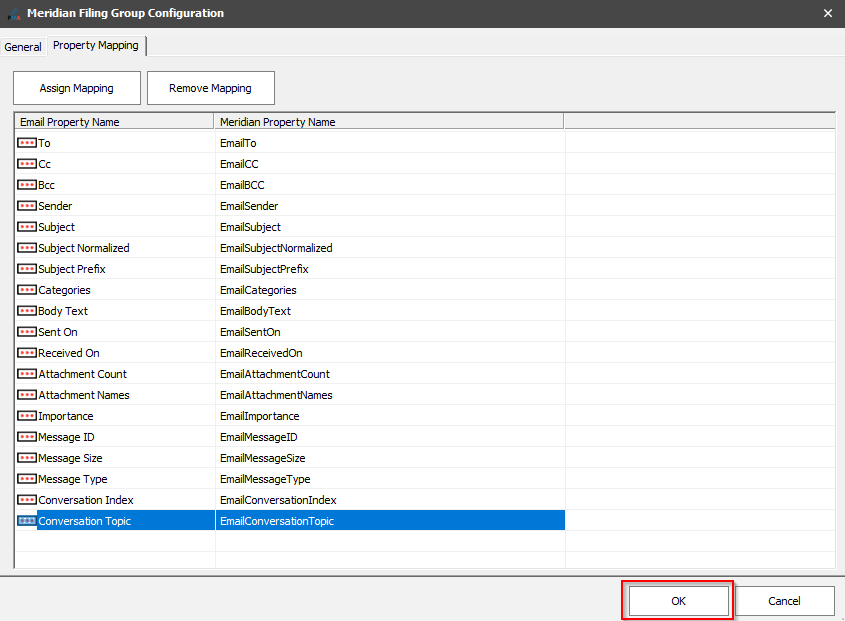
Now go through and setup each property mapping that you want to be captured when you file an email into Meridian
In the below example, each property has a corresponding Meridian property. Once all (required) properties have been assigned, press OK.
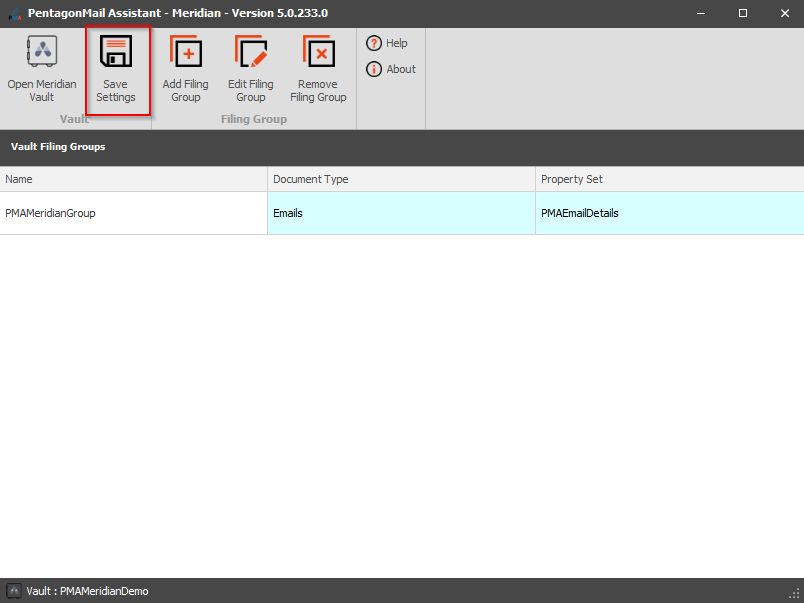
Press “Save Settings” to commit the changes.
This concludes the steps to configure the PMA connection to Meridian.