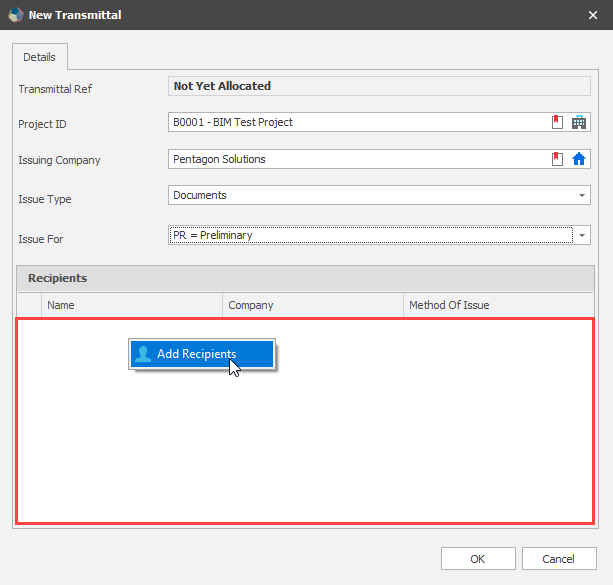
Adding Recipients to Transmittal
To add the Recipients of the Transmittal, right click in the recipients’ list area at the bottom of the ‘New Transmittal’ dialog and select ‘Add Recipients’ from the contact menu.
This will open the ‘Contacts’ dialog. You are able to scroll through the available Contacts, or type search text in the search box at the top of the dialog to quickly find a specific Contact. Check the checkbox next to the required Contacts to be Recipients for this Transmittal and once finished click the ‘Add’ button:
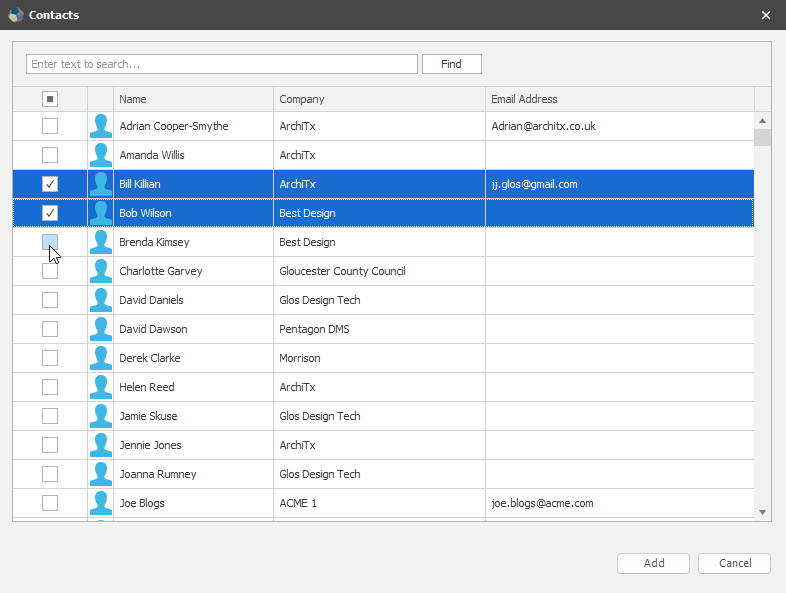
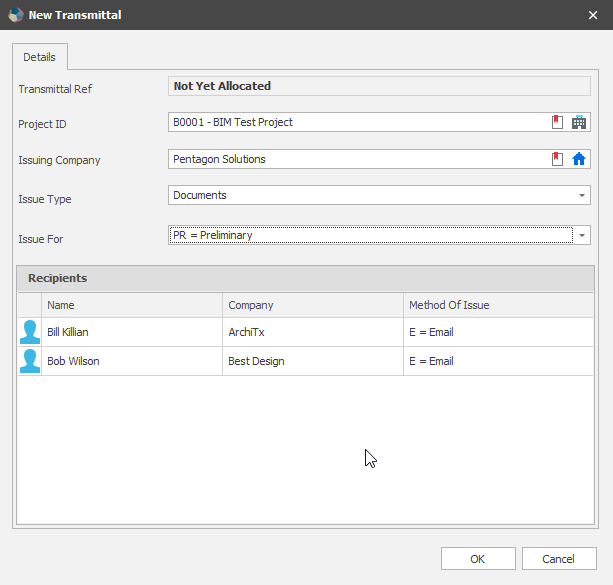
Then click ‘Add’ and the recipients will be added with the default ‘Method of Issue’ set as ‘E – Email’:
To change the method of issue, right click on the required recipient and select the required method from the context menu:
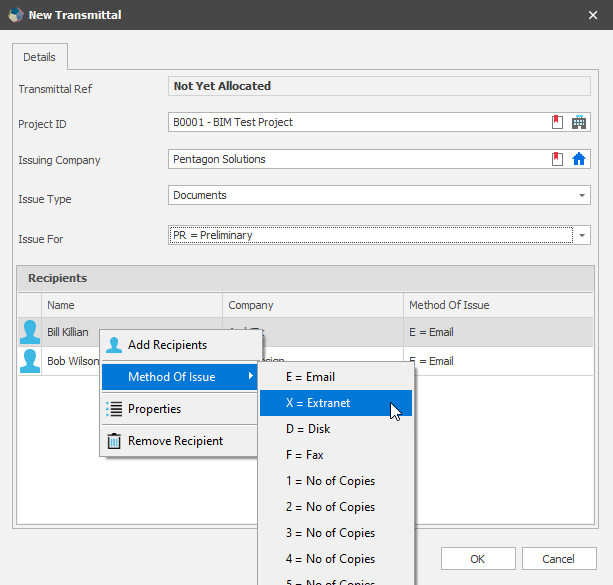
The method of issue is a value-list item that can be configured by your admin, so your list may look different to the list presented above. You can also multi-select recipients (ctrl + click) to set this value for multiple recipients in one action.
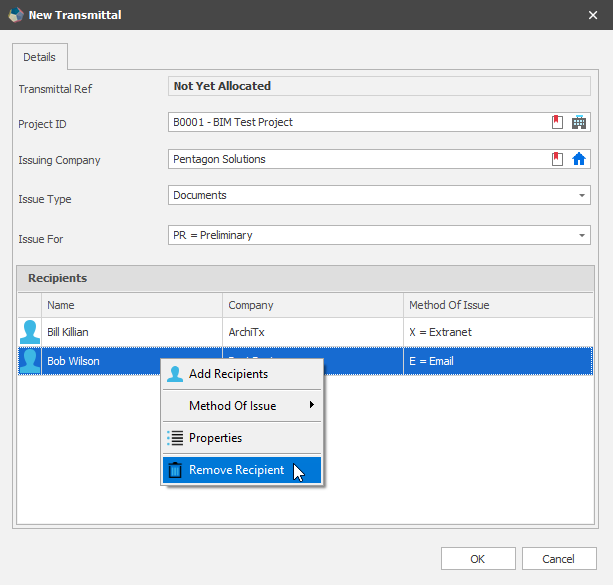
If you have added a recipient by accident, you can remove them by right clicking and selecting ‘Remove Recipient’ from the context menu. Please note: Once a transmittal has been issued you cannot remove a recipient as they form part of that transmittal history:
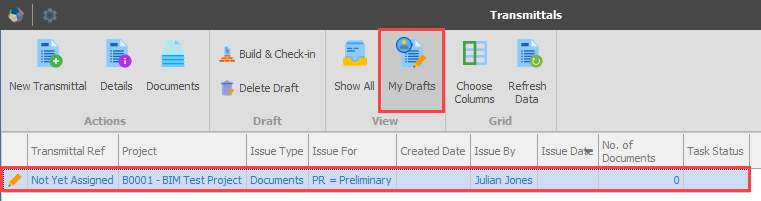
Once you have set all the fields, click ‘OK’ to create the new transmittal. The new transmittal will be created in a draft state (filter to only show your drafts by selecting ‘My Drafts’ in the view section of the ribbon) and will not initially have a ‘Transmittal Ref’ assigned. Think of it as an empty container awaiting content. In subsequent steps you will add documents:
Close the ‘Transmittals’ dialog by clicking the ‘X’ in the top right corner:
