Publish Sheets
The PentagonDocs Assistant ribbon in Revit allows for publishing the sheets created into the vault. This allows you to publish PDF, DWG, DWF or JPG renditions of the sheet. The DWG is created by Revit; therefore, you may wish to setup the Revit DWG Export options prior to publishing. DWF and Image output is also generated by Revit itself.
The PentagonDocs Assistant Client installs a PDF Printer that can be used for the output, and in supported Revit versions you can also choose to use the inbuilt Revit PDF Export functionality to create the PDF. To choose which PDF export method to use, select this from the ‘Settings’ option in the PDA ribbon:
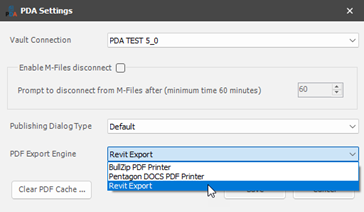
You can choose from ‘Revit Export’ which is the inbuilt Revit functionality, ‘Pentagon DOCS PDF Printer’ which is the PDF printer installed with the PentagonDocs Assistant client, and finally ‘BullZip PDF Printer’ which is a commercial third-party printer that may be purchased separately. There are also two options for how the publishing dialog will function, this is also configured in the ‘Settings’:
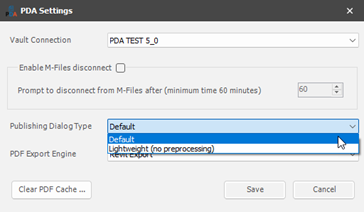
‘Default’ will open the publish dialog and automatically check every sheet against the corresponding objects in the vault. This loads information on the workflow state the sheet is at, and whether or not the metadata is synchronised correctly.
‘Lightweight (no preprocessing)’ will open the publish dialog but will not automatically check every sheet against the vault. This is especially useful if your model has many hundreds of sheets as this may take some time, and you only want to publish a selection of sheets, not all of them. In this mode you are able to select the sheets required (using CTRL + Click or SHIFT + Click selection methods), then you click the ‘Refresh’ button to carry out the check against the vault objects on only the selected sheets.
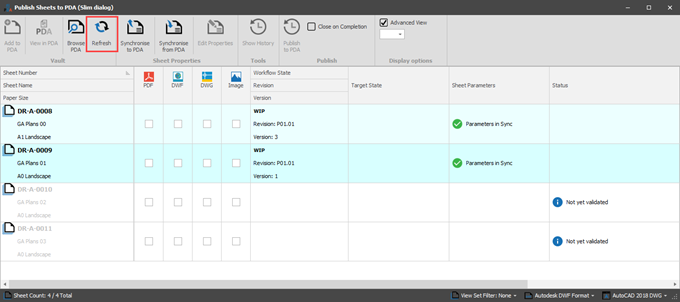
Click the ‘Publish Sheets’ icon to display the ‘Publish Sheets to PDA’ dialog:

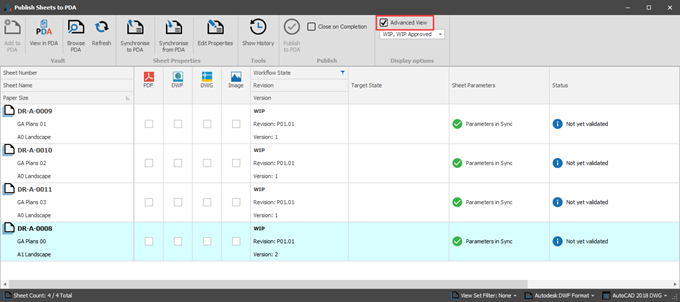
Ensure that the ‘Advanced View’ option is checked, and you will be presented with the PDF, DWF, DWG and Image options to publish. In the example above the publish dialog is set to the ‘Default’ method, so all sheets have been checked against the vault, the workflow states are shown, and the sheet parameters have been checked and are in sync.
In the screenshot below, the publish dialog is set to the ‘Lightweight (no preprocessing)’ option, and as you can see the workflow state, sheet parameters etc. have not been checked:
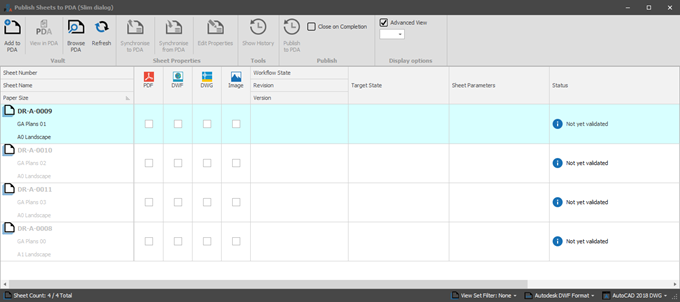
Simply select the required sheets that you wish to publish (using the standard Windows CTRL + Click or SHIFT + Click methods), then click the ‘Refresh’ button and only the selected sheets are checked against the vault:
Alternatively, should the model have many sheets, you can also use the filter options. In the example below the filter icon next to ‘Sheet Number’ has been selected (the icon appears as you hover the mouse cursor over ‘Sheet Number’), allowing you to search for and select specific sheets. Sheets can also be filtered by Revit View Set Filter (option highlighted in the bottom right of the dialog):
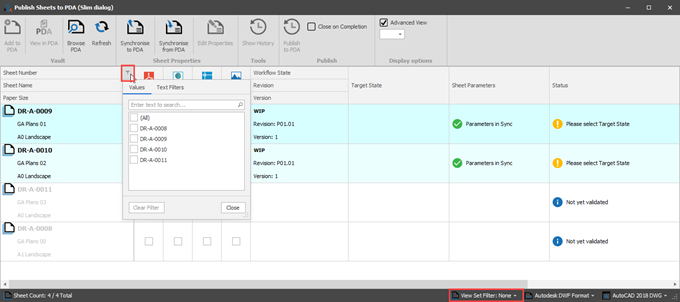
Once a filter has been set on the ‘Sheet Number’, you will see that the filter icon remains in view. This is to remind you that you have a filter set in the view. When you close the publish dialog any filters are cleared.
When opening the publish dialog, or when carrying out the refresh function, you may see that some sheets are flagged as having their ‘Parameters out of Sync’. This is usually due to the sheets in the PDA vault having been moved through the workflow since the last sync took place in the Revit model. Simply select the sheets and click the ‘Synchronise from PDA’ button in the publish dialog (alternatively if you know for example you have made changes to the Title 1 metadata than can be synchronised back to the vault, click the ‘Synchronise to PDA’ button):
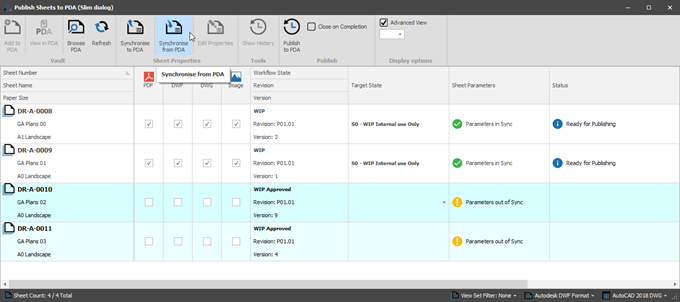
This ensures that the up-to-date metadata in the PDA vault has been synchronised with the sheet, and the ‘Status’ will be updated to show ‘Parameters in Sync’.
With the sheets you wish to publish selected, check the options for the formats that you wish to publish. Please also note that in the bottom right of the dialog are settings for the DWG and DWF versions that you wish to publish:
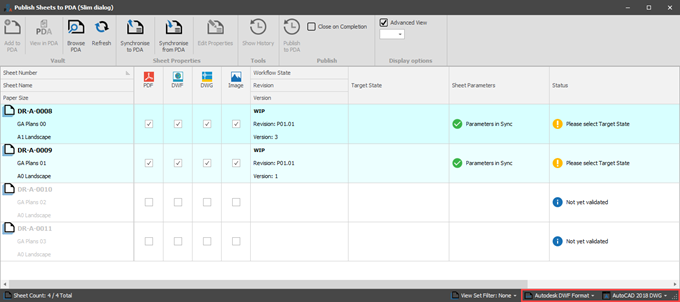
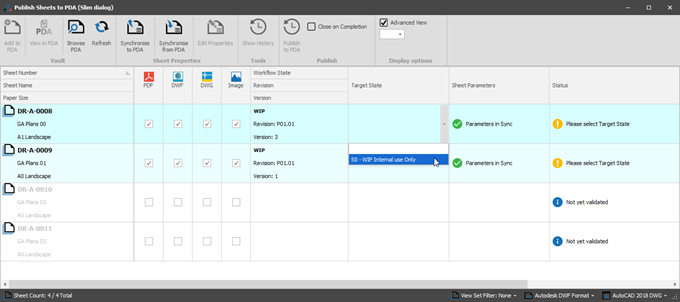
With this selection made, you can see that you are prompted to ‘Please select Target State’ in the ‘Status’ column. In the example below, the selected sheets are at the WIP stage of the ISO 19650 process. Therefore the only target state available is ‘S0 - WIP Internal use Only’:
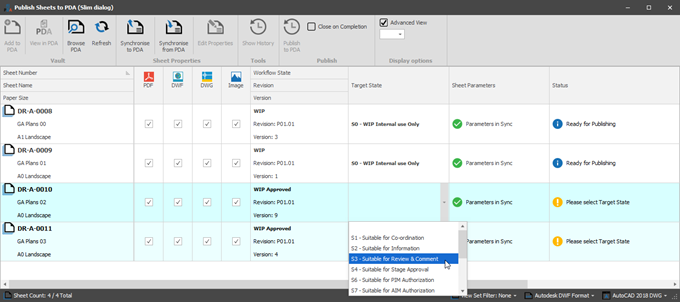
In the example below, the selected sheets have already been published to WIP and have been moved through the approval workflow in the PDA vault, therefore they are able to be published to the various Shared and Published suitability states. Simply select the required state. Please note: If your project has been configured to require the Suitability States metadata on the WIP sheet, this information will have already been set and you will be able to select a ‘NA - As already set on WIP Approved Drawing’ option instead.
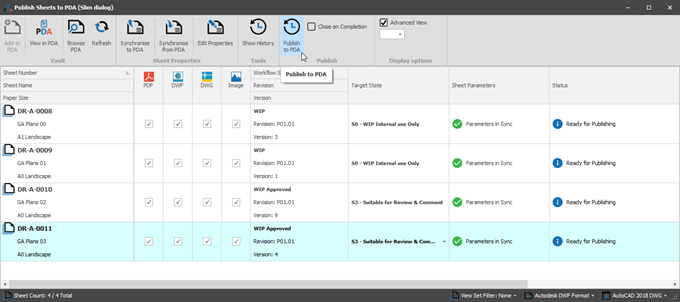
Once you have made all the required selections, click the ‘Publish to PDA’ button:
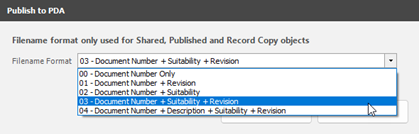
When publishing Shared or Published content, you are able to specify the format that the filename for this content will take. This is especially useful for when this content is issued externally as it makes it simple to identify what a drawing is via the filename (this may also be shown when publishing at S0 - WIP, however the selection will be ignored and the filename will not be changed. Only Shared/Published sheets will be renamed):
When a sheet is published, the target state/suitability code is used to set the required revision format and other associated metadata. This is used to ensure that the published content contains the correct information in the title-block, such as revision and suitability description. The sheets are published into PentagonDocs Assistant in the formats you selected, updating the existing objects in the PDA vault.
