Trial with ACC / BIM 360
You have successfully installed PentagonMail Assistant. So firstly a big Thank you! from us for showing your interest. We hope that you like the software and find the next steps easy, but if you have problems or just want to ask a question, please either email support@pentagonsolutions.com or phone us on +44 (0)2890 455355 (Option 3).
Here are the next steps to set up your ACC or BIM 360 location:
- Acquire a trial license
- Install the ACC Filer
- Set up ACC or BIM 360 Location
- Select Project and Mapping
- Add Location (Folder) to Group
- Save Group
- Start Filing
Acquire a trial license
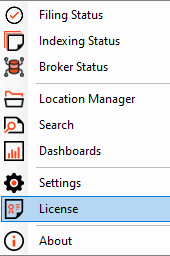
Click the PentagonMail Assistant tray icon  and then select "License". Ensure you are connected to the internet to activate your license. If the license won't activate, refer to the 'License won't activate' advice.
Install the ACC Filer
Ensure that you select the ACC filer to install during setup. This filer will not be installed by default, so it's important to make this selection during installation.
Set up ACC or BIM 360 Location
To create a new ACC or BIM 360 Location, launch the Location Manager either from the main menu in Outlook;
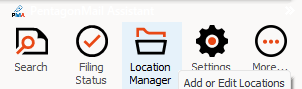
or from the tray icon in the bottom right corner of your screen.

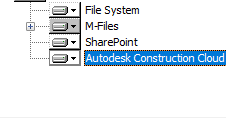
To proceed, click on the New icon located in the toolbar. Once the menu appears, select Autodesk Construction Cloud Group from the list of options to continue.
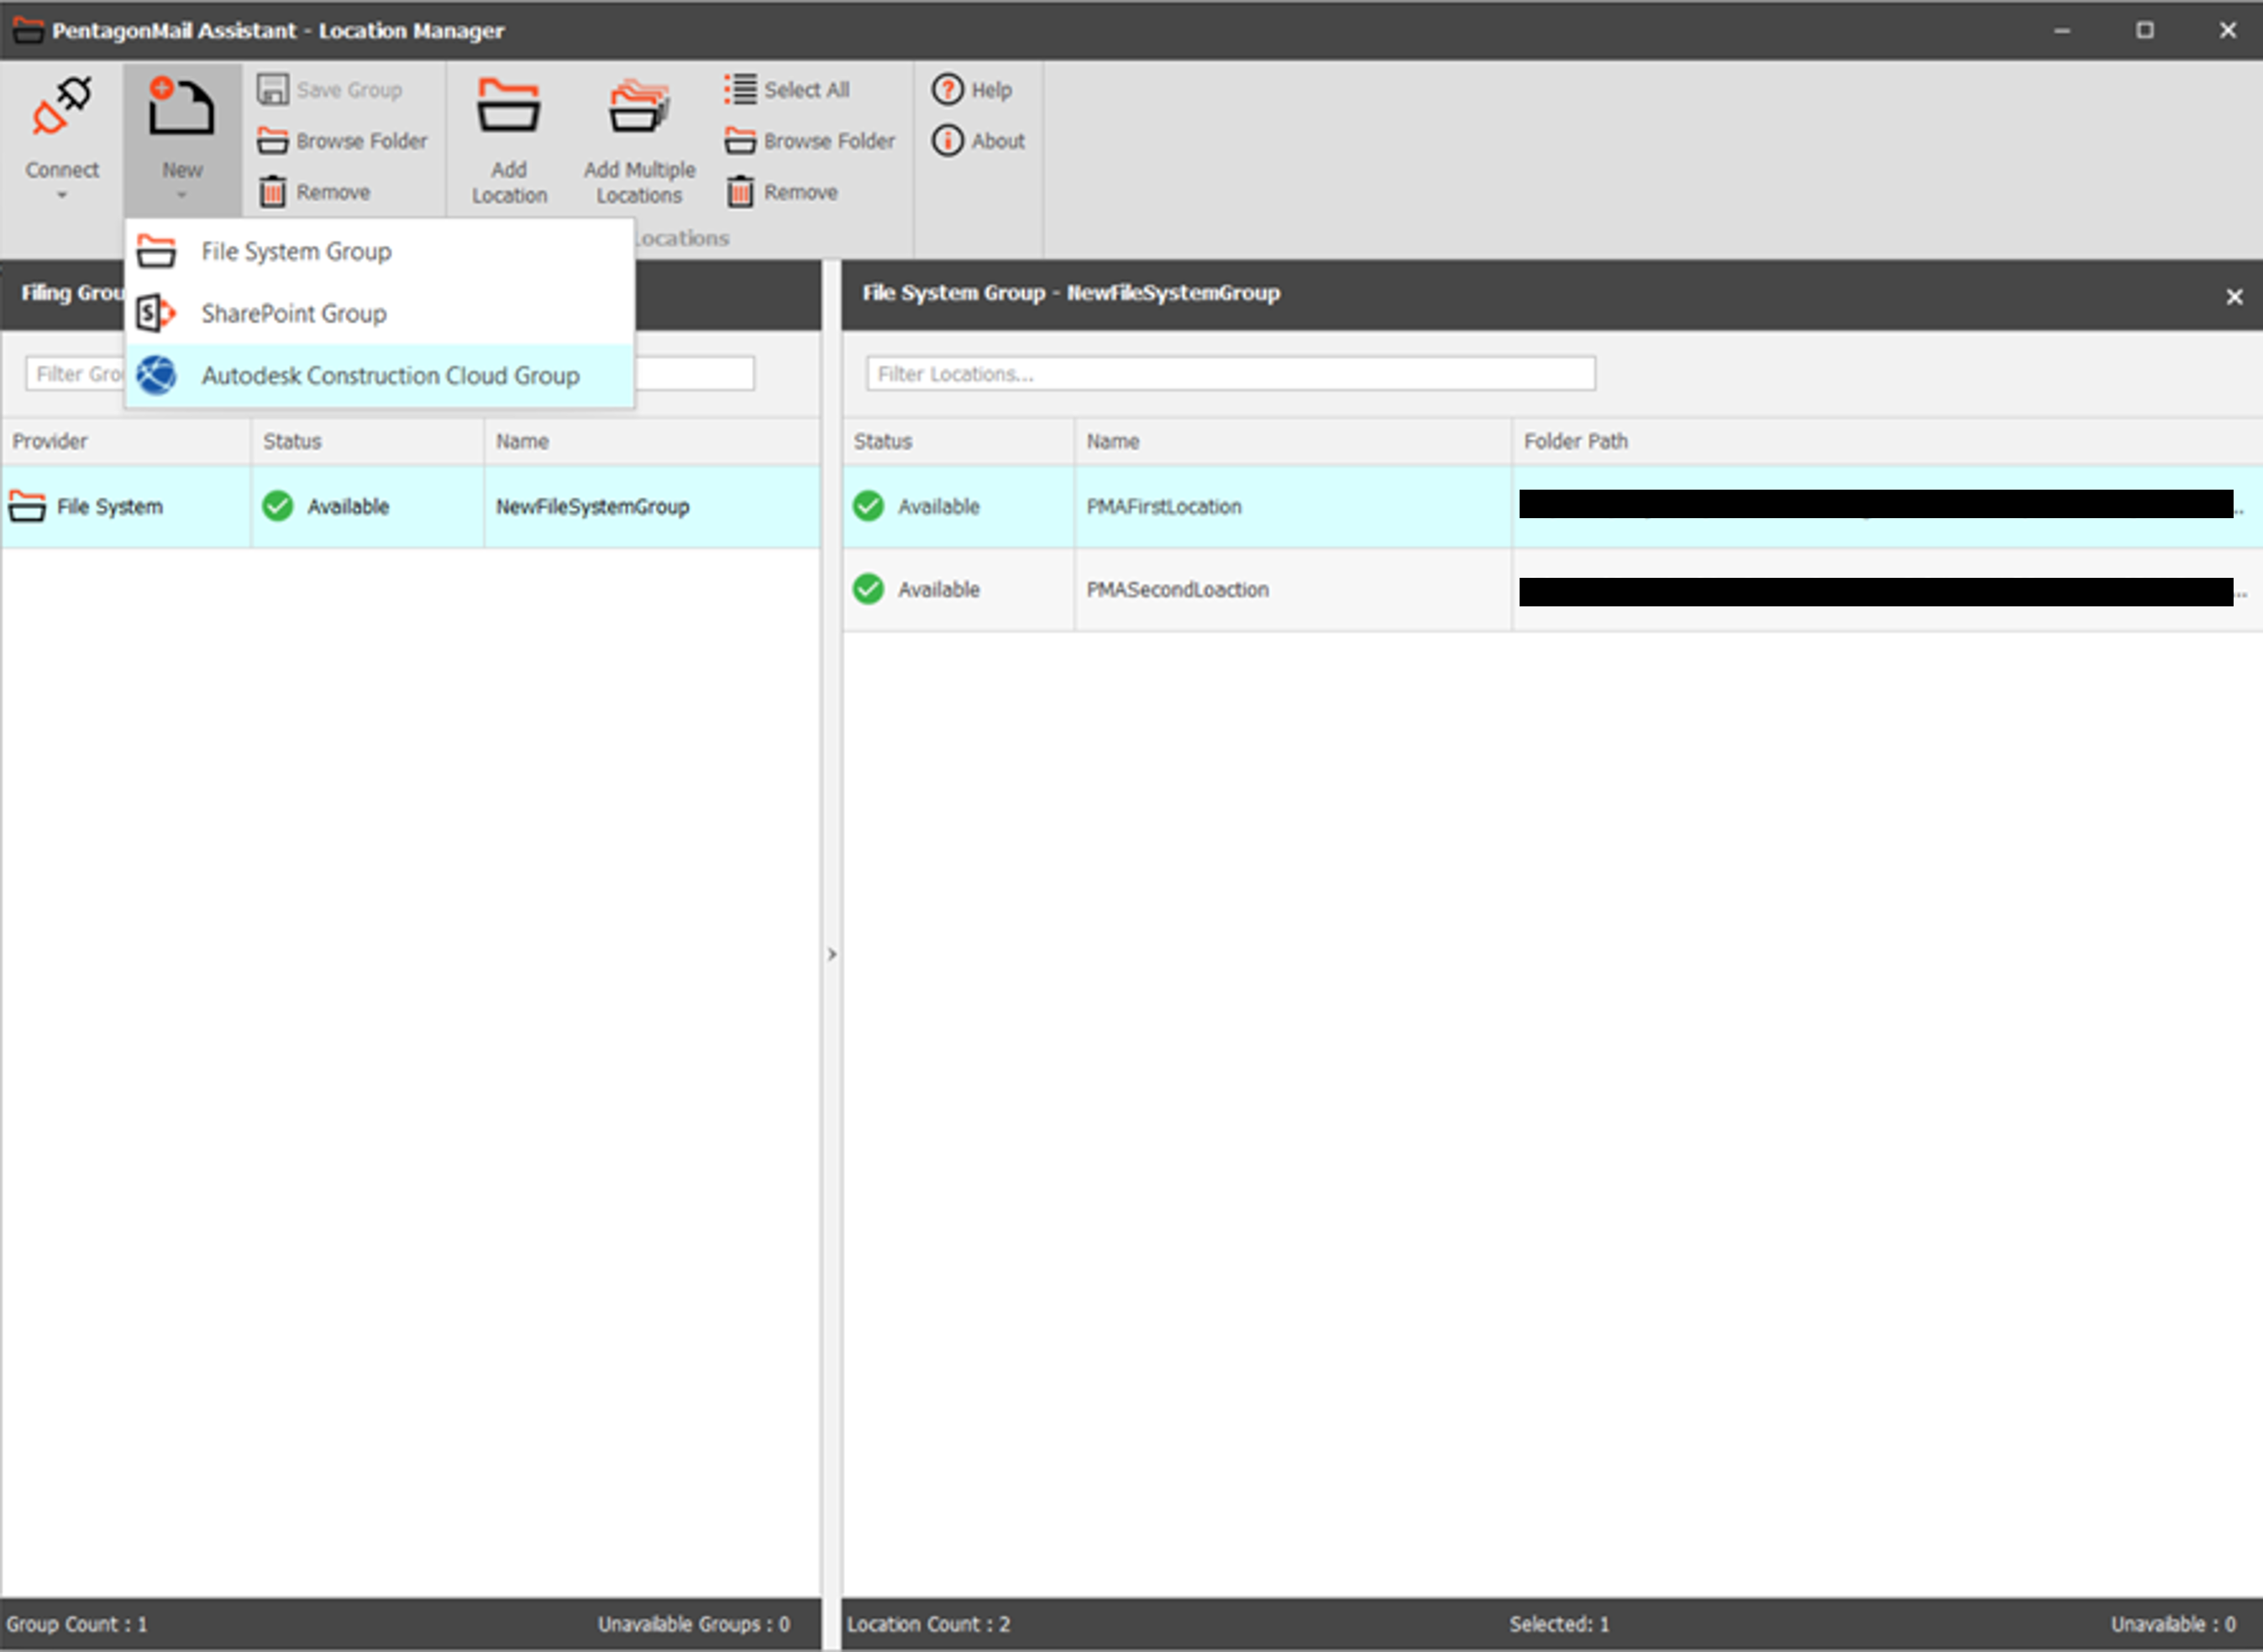
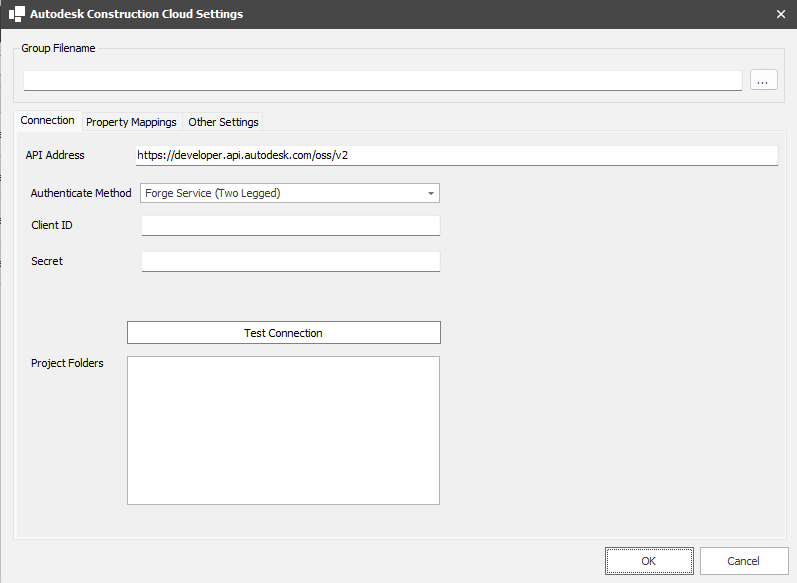
After this enter in the appropriate details, including:
- Choose a suitable name for the group configuration file.
- Use the provided API address without making changes (this will be locked in future releases).
- Use the following Client ID and Secret provided to access test projects:
- Client ID: [Client ID]
- Secret: [Secret]
- Click "Test Connection" and wait a couple of seconds for the message "Connection Successful."
Select Project and Mapping
- Expand "BIM360 Hubs" and choose the desired hub.
- Choose one of the available projects.
- Click on "Property Mappings" to view available attributes.
- Assign mappings by selecting an Email Property and choosing an ACC attribute to map to it.
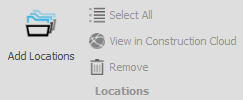
Add Location (Folder) to Group
- Click "Add Locations."
- Navigate to the desired folder structure (e.g., Project Files) and select the folder to add.
- Click "Add."
Save Group
After configuring settings and adding locations, click "Save Group" to apply changes.
Start Filing
Once the setup is complete, you can file to ACC/BIM360 as usual, leveraging the configured settings and mappings for seamless integration.
Congratulations, you are ready to start using PentagonMail Assistant with Autodesk Construction Cloud or BIM 360. We have just covered the basics, so to learn some key capabilities, watch the video tutorials or if you want to get as much as possible from the tool, look through this documentation and in particular the Search section.