Quick Start Guide
Before you dive into this
Before you dive into setting this up, please invest time in reading and understanding this section as it could save you a lot of wasted time.
How does it work
Our Publishing tool in Revit records the: location, font, justification, orientation, etc., of the text into a non-printing part of the PDF file format so that, when you later wish to bulk edit the revision of a selection of drawings you can simply update the metadata in M-Files and our server-side prost-processor will change the text of both PDFs and DWGs without launching either Revit or AutoCAD, and it will preserve the: justification, orientation, font, etc. This typically takes 2 seconds per drawing.
Special types of text objects
In AutoCAD and Revit you can have both dumb text and intelligent text. The latter is not 'intelligent' in the literal sense but it does possess extra properties that make it ideal for these situations (e.g. attribute name). It is therefore common practice for title blocks to be built using these more versatile types of text as the user can then control them with more precision and ease.
AutoCAD has the concept of 'Attributes' and Revit has the concept of 'parameters' which can then control the text in a 'family'.
Assumptions
We assume that you know how to create blocks with attributes in AutoCAD and families with shared parameters in Revit.
In this documentation we have also assumed that you want to export both PDFs and DWGs of a Revit sheet so that you can subsequently edit both of them, as most customers wish to do this.
Use the same name
Make sure that for each text object you use the same naming. Whilst it is possible for some of the names in the table below to differ from each other, don't do it. Changing even the 'prompt' and 'default' for an AutoCAD attribute can lead to errors that are difficult to trace.
As AutoCAD attributes can’t have spaces, we recommend that for any given property you: use the same name, that it’s all UPPERCASE and with no spaces or special characters e.g. PROJECTNUMBER i.e.
|
Revit |
|
|
Shared Parameter Name |
PROJECTNUMBER |
|
Sample Value |
PROJECTNUMBER |
|
AutoCAD |
|
|
Tag |
PROJECTNUMBER |
|
Prompt |
PROJECTNUMBER |
|
Default |
PROJECTNUMBER |
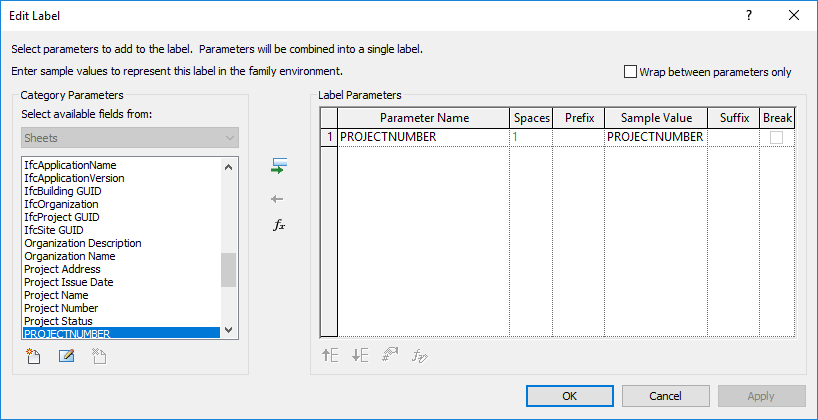
For example in Revit:

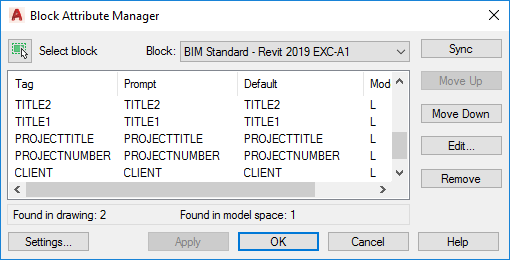
And in AutoCAD:

Templates
The templates for the Revit family and the AutoCAD sheet drawing must share the same name. They must also be in your M-Files vault, accessible to all the staff that need to use them, and have the Is Template property set to 'True'.

As the DWG version of the drawing sheet needs to graphically match the one in Revit, you will need to take care to ensure that the placement of linework and text is identical.
Map Revit parameters to M-Files properties
Once your Revit family and AutoCAD template are ready, you can then map them to M-Files properties.
Publishing from Revit
You can now publish sheets from Revit that have the hidden data allowing them to be post-processed by the server.
From the PentagonDocs Assistant ribbon menu in Revit, select Publish Sheets.

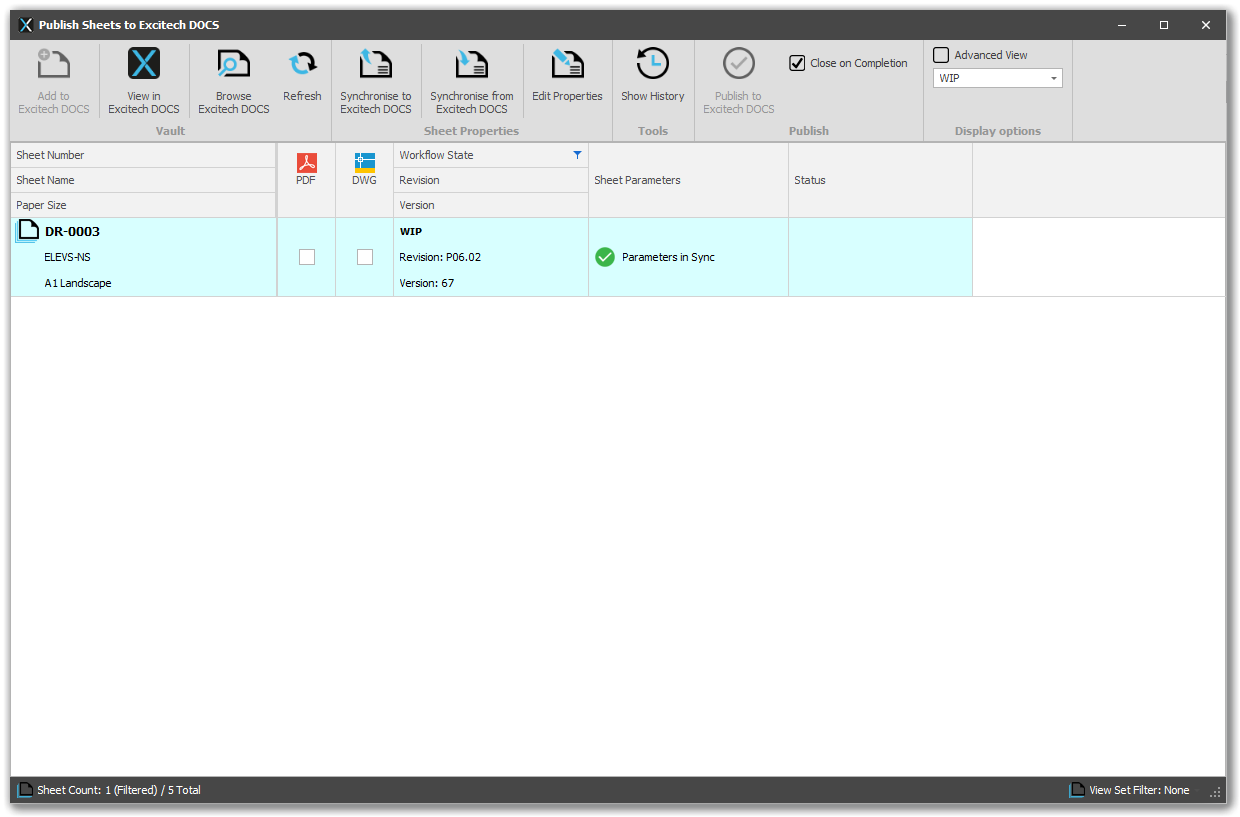
The Publish Sheets dialogue will by default, only list those sheets that are in the WIP state. Select one or more sheets, check the boxes for DWG and DWG output and then select Publish to PentagonDocs Assistant.

If you have selected more than one output format, a multi-file document will be created in M-Files containing both files.
You can now use event handlers or workflow transitions in M-Files to call the script functions to update the text based on the current metadata.